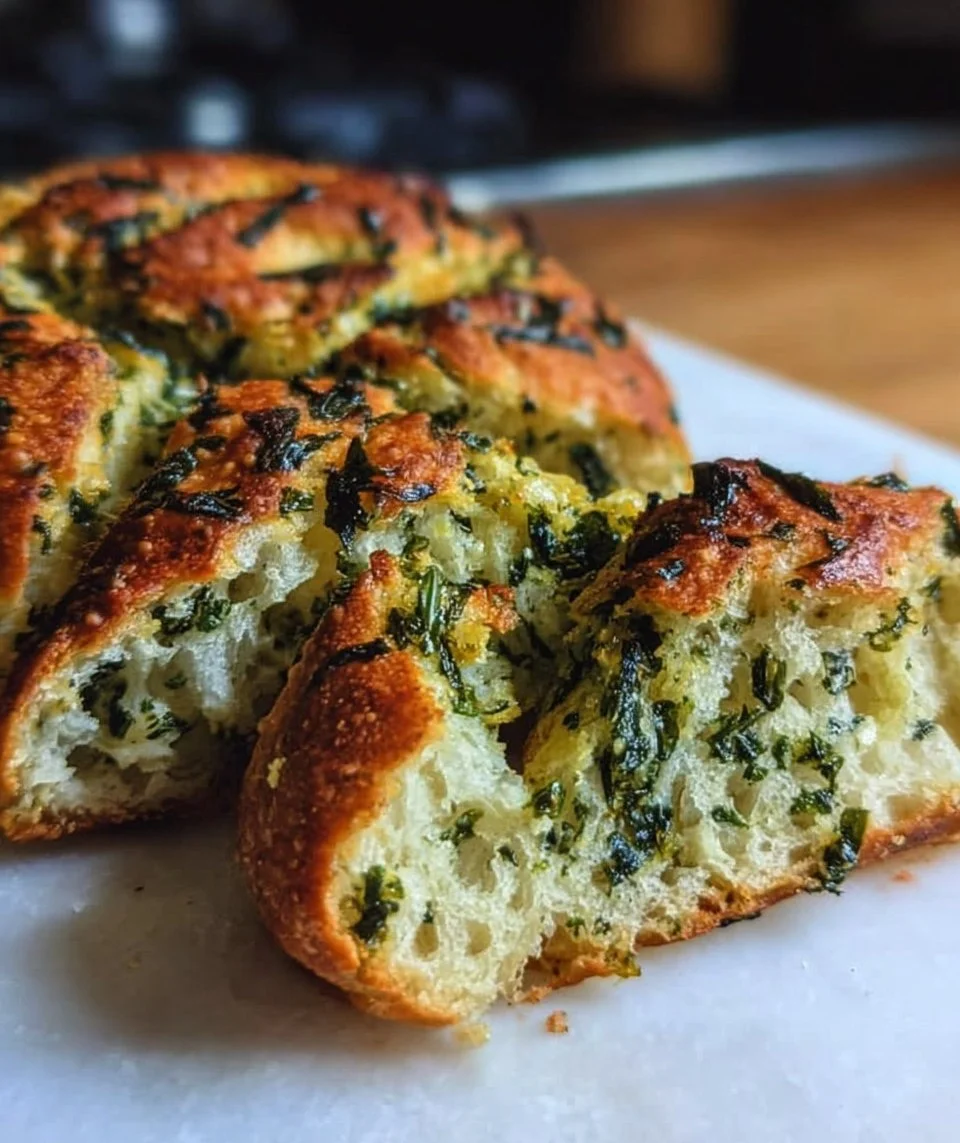
The air hums with an irresistible aroma that dances between the comforting scent of freshly baked bread and the bright, grassy notes of wild garlic. Imagine breaking through a crunchy, golden crust to reveal the tender, soft interior, flecked with vibrant green from the wild garlic. Each bite is a harmonious blend of earthiness and warmth, where the heat of the crust meets the inviting, herby flavor of the garlic, teasing your taste buds in the best possible way. This isn’t just bread; it’s a celebration of simplicity and nature’s bounty, waiting to elevate your dining experience.
Picture this: you’re gathering with family and friends around the dinner table, laughter filling the air, and the centerpiece is a rustic basket of crispy wild garlic bread. As you tear off a piece, the audible crunch punctuates the cozy ambiance, while the steam wafts up, enveloping you in comfort. The inclusion of wild garlic adds an unexpected twist, transforming a staple into a gourmet delight. You delight in the rich, creamy texture as the bread pairs beautifully with dips, spreads, or simply enjoyed on its own, a morsel to savor.
Why You’ll Love This Crispy Wild Garlic Bread
This crispy wild garlic bread stands out for its delightful texture and unique flavor profile. The crust delivers a satisfying crunch, while the interior remains soft and airy, making it the ultimate companion for any meal. Each mouthful bursts with the freshness of wild garlic, a seasonal treat that brightens even the simplest of dishes. Whether you celebrate a special occasion, host a casual dinner party, or simply indulge in a cozy night in, this bread elevates every gathering, delivering a touch of culinary artistry.
But the appeal of this recipe goes beyond its taste; it embraces the spirit of wholesome cooking. Using good-quality, natural ingredients, this wild garlic bread allows you to whip up something remarkable without requiring extensive culinary skills. Plus, it offers ways to customize based on your preferences or what you have on hand, making it flexible and approachable.
Preparation Phase & Tools to Use
Getting started with your crispy wild garlic bread requires just a few essential tools. Each plays an integral role in achieving bread perfection.
- Mixing Bowl: A large, sturdy bowl ensures enough room for ingredients to come together without splattering.
- Measuring Cups/Spoons: Accurate measurements lead to consistent results in baking.
- Floured Surface: A clean and floured workspace helps in kneading the dough without it sticking.
- Bench Scraper: This handy tool can help manage sticky dough and shape your loaf with ease.
- Baking Sheet or Dutch Oven: Depending on your preference, a baking sheet gives you a classic loaf, while a Dutch oven ensures a steamy environment for a perfectly crisp crust.
Preparation Tips:
- Use warm water (not too hot) to activate yeast effectively.
- Ensure your wild garlic is fresh, as wilted leaves lose their vibrant flavor.
- If you prefer a softer crust, cover the loaf with a kitchen towel during the last few minutes of baking.
Ingredients for Crispy Wild Garlic Bread
Gather your simple yet flavorful ingredients to embark on this culinary journey:
- 500 g wheat flour: The backbone of your bread, it creates structure and a lovely chew.
- 1 packet dry yeast: This fermenting agent provides the rise and airy texture.
- 1 teaspoon salt: Essential for flavor, enhancing all the other ingredients.
- 300 ml warm water: Activates yeast and brings the dough together.
- 100 g fresh wild garlic: Adds a lovely herbal aroma and taste, truly the star of this recipe.
- 2 tablespoons olive oil: Incorporates richness and moisture into the bread.
- Pepper to taste: A hint of spice rounds out the flavor beautifully.
If you’re feeling adventurous or can’t find wild garlic, consider substitutions like fresh chives or roasted garlic for a different but equally delicious flavor.
How to Make Crispy Wild Garlic Bread
-
In a large bowl, whisk together the wheat flour, dry yeast, and salt, creating a well-mixed base.
-
Pour in the warm water and drizzle the olive oil, stirring until the ingredients meld into a shaggy dough.
-
Rinse and roughly chop the fresh wild garlic, then fold it gently into your dough, ensuring even distribution of those vibrant green flecks.
-
Place the dough onto a floured surface, knead for 5–10 minutes until it transforms into a smooth, elastic ball.
-
Transfer the dough to a lightly greased bowl, cover with a kitchen towel, and set it in a warm area to rise for about an hour, or until it doubles in size.
-
Once risen, gently turn the dough onto a floured work surface, knead it briefly to release any air bubbles, and shape it into a loaf.
-
Allow the dough to rest for another 30 minutes to develop its final texture.
-
Preheat your oven to 220 °C (428 °F), then bake the bread for about 25–30 minutes, until the crust turns a tantalizing golden brown and exudes that mouthwatering aroma.
-
After baking, remove from the oven and let cool on a rack before serving—if you can resist the temptation!
Chef’s Notes & Helpful Tips
- Make-ahead tips: To save time, prepare the dough a day in advance and let it rise overnight in the fridge. Bring it back to room temperature before baking.
- Cooking alternatives: If you prefer, you can use an air fryer. Adjust the baking time, checking for doneness earlier since air fryers often cook faster.
- Customization ideas: Toss in some shredded cheese, or replace wild garlic with fresh herbs like rosemary or chopped olives for a different flavor twist.
Common Mistakes to Avoid
-
Not activating the yeast: Always check that your yeast forms bubbles in warm water before mixing. If it doesn’t, start again with fresh yeast.
-
Over-kneading or under-kneading: An overly tough dough results from excessive kneading, while under-kneading leads to dense bread. Aim for a smooth, elastic texture.
-
Skipping the rising time: Allow the dough to rise thoroughly—this is where the magic happens, creating that airy texture.
-
Incorrect oven temperature: Use an oven thermometer. Baking bread at the wrong temperature affects crust and texture.
What to Serve With Crispy Wild Garlic Bread
The beauty of crispy wild garlic bread lies in its versatility. Here are some delectable pairings to consider:
- Extra virgin olive oil and balsamic vinegar: A classic dip that allows the bread’s flavor to shine through with every crusty bite.
- Hummus: The creamy texture of hummus beautifully complements the crispy crust, adding a lovely contrast.
- Cheese platter: Pair with a variety of cheeses; the sharpness of aged cheddar or the creaminess of brie creates a harmonious balance.
- Soups: This bread turns ordinary soups into an extraordinary experience; try it with a robust tomato basil or a hearty minestrone.
- Salads: Pair alongside a refreshing mixed green salad tossed in a light vinaigrette—its crunch pairs wonderfully with leafy greens.
- Grilled vegetables: Serve with roasted or grilled veggies for a colorful and nutritious meal.
- Charcuterie board: The perfect addition to a charcuterie board, enhancing meats, cheeses, and spreads with every slice.
Storage & Reheating Instructions
To maintain the delightful crispness and freshness of your crispy wild garlic bread, store it in a paper bag or wrapped in a kitchen towel for up to two days at room temperature. For longer storage, freeze the bread by wrapping it tightly in plastic wrap and then aluminum foil. Thaw overnight in the fridge when ready to enjoy and reheat it in the oven for a few minutes to regain that beautiful crust.
Estimated Nutrition Information
Approximate values per serving (one slice, serves about 10):
- Calories: 150
- Protein: 4g
- Carbohydrates: 30g
- Fat: 3g
- Fiber: 1g
Disclaimer: Nutritional values are estimates and may vary based on ingredients and serving sizes.
FAQs
Can I use other types of flour?
Absolutely! You can try whole wheat flour for a heartier loaf, but adjust the liquid as necessary since whole wheat flour absorbs more moisture.
What if I don’t have access to fresh wild garlic?
If fresh wild garlic isn’t available, consider using garlic powder or several cloves of roasted garlic blended into the dough for flavor.
How can I tell when the bread is done baking?
Look for a golden-brown crust and tap the bottom of the loaf; if it sounds hollow, it’s ready.
Can I add other ingredients into the dough?
Of course! Feel free to mix in ingredients like sun-dried tomatoes, olives, or herbs for an extra kick of flavor.
Is it possible to make this bread gluten-free?
Yes, substitute the wheat flour with a gluten-free flour blend. Ensure that the yeast you use is gluten-free as well.
Conclusion
There’s something undeniably magical about baking your own bread, and this crispy wild garlic bread is a shining example of that magic. The combination of warm, toasted crust with a flavorful, herb-infused interior makes for an experience that warms the heart and satisfies the soul. So go ahead, roll up your sleeves, and dive into this kitchen adventure. With a simple set of ingredients and easy steps, you’ll create something that not only nourishes your body but also weaves memories and joy into every slice. Your family and friends will thank you, and your taste buds will sing with delight!
Print
Crispy Wild Garlic Bread
- Prep Time: 15 minutes
- Cook Time: 30 minutes
- Total Time: 45 minutes
- Yield: 10 slices 1x
- Category: Bread
- Method: Baking
- Cuisine: European
- Diet: Vegetarian
Description
A delightful blend of crispy crust and tender interior, infused with the vibrant flavors of wild garlic.
Ingredients
- 500 g wheat flour
- 1 packet dry yeast
- 1 teaspoon salt
- 300 ml warm water
- 100 g fresh wild garlic
- 2 tablespoons olive oil
- Pepper to taste
Instructions
- Whisk together the wheat flour, dry yeast, and salt in a large bowl.
- Pour in the warm water and drizzle in the olive oil, stirring until combined.
- Chop the fresh wild garlic and fold it into the dough evenly.
- Place the dough onto a floured surface and knead for 5–10 minutes until smooth.
- Transfer the dough to a greased bowl, cover with a towel, and let rise in a warm place for about 1 hour.
- Turn the risen dough onto a floured surface, knead briefly, and shape into a loaf.
- Rest the dough for 30 minutes to develop its texture.
- Preheat the oven to 220 °C (428 °F) and bake for 25–30 minutes until golden brown.
- Remove from the oven and cool on a rack before serving.
Notes
For a softer crust, cover with a kitchen towel during the last few minutes of baking. You can also store it in a paper bag or wrap in a kitchen towel for up to two days.
Nutrition
- Serving Size: 1 slice
- Calories: 150
- Sugar: 0g
- Sodium: 200mg
- Fat: 3g
- Saturated Fat: 0.5g
- Unsaturated Fat: 2g
- Trans Fat: 0g
- Carbohydrates: 30g
- Fiber: 1g
- Protein: 4g
- Cholesterol: 0mg